Monthly Archives: August 2016

Car Repaint Project: Day 5 – Fine Sanding and Third Layer of Paint

I took Monday off.  I just didn’t feel like working on the car yesterday evening.

Before I log this day, let me note that it’s 12:30 am right now. I started the work at around 7:30 pm. So, it took me exactly 5 hours to finish.  If I learned one thing today it is that painting with heavier paint takes longer time.

I thought I had bought 800 grit, but I found that I had 600 grit instead. I used it to makes scratches all over the car.  It’s impossible to sand off the paint with it. Just rough up the car for easier reception of the third layer of paint.  I prepared the paint by just pouring more paint into the 40/60 can I had prepared before. It’s probably more like 1:5 ratio, maybe little too thick.

The paint definitely felt different this time. I wouldn’t say that it was easier to paint than using 40/60 paint, because it wasn’t, but there are some differences that sometimes made it easier. You can paint the whole panel for example, and then come back to brush over it.  If I understand it correctly, the paint is supposed to dry faster with more thinner, but I found that the heavier paint seemed to dry faster.  Anyhow, I guess it depends. I’m glad this is going to be the final layer, even though I’ve read that some people would put even more layer of paint from here.  I think three layers suffice for this type of work. Besides, I’ve gone farther than some of the write-ups I had read.  Anyway, here are photos after the third layer of paint was put on the car. I like it. I’m going to be spraying with clear coat tomorrow after work.

IMG_20160831_001520 IMG_20160831_001454 IMG_20160831_001435 IMG_20160831_001400 IMG_20160831_001543 IMG_20160831_001508

Introduction to basic commands in PostgreSQL for MySQL users

Last tested on Ubuntu 16.04.01 LTS (xenial)

Getting into DB console.

MySQL:

$ mysql -uroot -p

PostgreSQL:

$ sudo su postgres
postgres@hydrogen:~$ psql

Creating DB

Creating a database and granting a user complete access.

MySQL:

mysql> create database mydb;
mysql> grant all on mydb.* to dbuser@localhost identified by 'mypass';

PostgreSQL:

postgres=# create user dbuser with password 'mypass';
postgres=# create database mydb;
postgres=# grant all privileges on database mydb to dbuser;

Listing DBs

You can list the DBs.

MySQL:

mysql> show databases;

PostgreSQL:

postgres=# \l

Selecting a DB

You can select a DB.

MySQL:

mysql> use mydb;

PostgreSQL:

postgres=# \connect mydb;

After selecting a DB you can go ahead and execute SQL commands.

Listing all tables

You can list tables in a DB.

MySQL:

mysql> show tables;

PostgreSQL:

postgres=# \dt

Change the password of a user

You can list tables in a DB.

MySQL:

mysql> set password for 'dbuser'@'localhost' = password('newpassword');

PostgreSQL:

postgres=# alter user "dbuser" with password 'newpassword';

Exiting from DB

Ctrl-D should exit from both.

Car Repaint Project: Day 4 – Sanding and Second Layer of Paint

Today I spent about 4 hours after church sanding and putting on the second layer of paint. This time, I took time to sand using 400 grit, having learned from putting on the first layer. What I’ve learned is that paint don’t really stick well without enough sanding, especially on vertical pieces like the doors. Even with a good scratches from sanding it can be little frustrating, but it may have something to do with the amount of thinner I’ve added to the paint. Mine was nearly 40 thinner/60 paint, which really isn’t according to many recommendations I had read, including the one on the paint can itself, which recommends little or none.  Anyway, first two layers are supposed to be somewhat thin anyway, in order to speed the drying, and the last coat is supposed to be thicker.  I normally don’t praise the my own work, but after putting on the second coat I had impressed myself. It started to look like a decent paint job!  I’m now a firm believer in using Rust-Oleum. 😉  Of course, having done the work myself, I know all of the little inadequacies and places where there are too much paint or too little, but overall, it’s quite satisfying, albeit back-breaking. This ran into late evening hours, and I won’t get into details of little pesky bugs sticking on the paint and so on.  Just use your common sense if you’re following a similar procedure.

IMG_20160828_211522 IMG_20160828_211533  IMG_20160828_211631 IMG_20160828_211646 IMG_20160828_211707  IMG_20160828_191250  IMG_20160828_211610 IMG_20160828_211513

For a better comparison I should have taken some photos before the job, but I was merely thinking of blogging this as a type of record or a log.  Anyway, I had to rummage through my old photos to find this one (a stitched-up panoramic version) I had taken at Taos several years back.  You can see how the paint was coming off.

nissan-before-paint


Car Repaint Project: Day 3 – First layer of paint

It must’ve taken up a good half of Saturday for this.  After taping and spraying the car with primer, and waiting for it to dry, I’ve applied the first layer of paint.  I had no previous experience of painting using form brushes, so I was little frustrated with how things looked and I even had some places where I accidentally squeeze the form causing bubbles to appear and then even vertical drips.  I’ve learned quite a bit on this first layer.

After spraying on the primer.

DSC03641 DSC03642 DSC03643

After the first layer of the paint.

IMG_20160827_145202 IMG_20160827_145122

Car Repaint Project: Day 2 – More Sanding

I don’t know where I had the energy, but I came home after 2 hours of kendo (tonight’s keiko intensity was similar to an hour of aerobic exercises) then I quickly jumped into my old jeans and then brought the car out of the garage to start sanding. It was already dark (8:30 pm?), so I had to put my head-mounted light on.  The scratches on the car was surprisingly easier to see with the flashlight. I managed to sand down the entire car.  Instead of a good clean wash with water, I just wiped down the car with a good dose of mineral spirit with rags.  It’s good enough.  It felt like two hours had passed by, but when I checked the time, it was more like an hour and a half.  I stopped only because I felt physically exhausted and hungry.  I don’t remember what I had for dinner, but the pang in the stomach was starting to creep into my focus.  I just started taping the edges and then brought the car in.  The air was cool and nice tonight.

IMG_20160826_212805 IMG_20160826_212825 IMG_20160826_214517 IMG_20160826_221829

I’m sure someone striving for a perfection would easily spend several more days sanding.

Car Repaint Project: Day 1 – Sanding

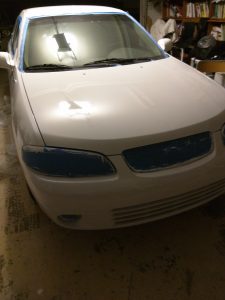
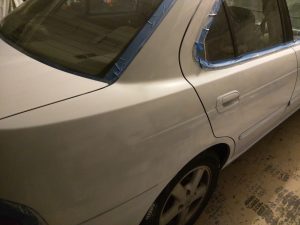
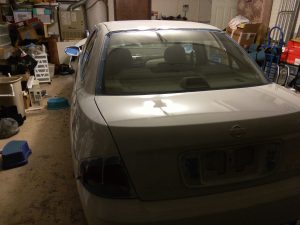
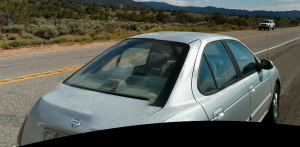
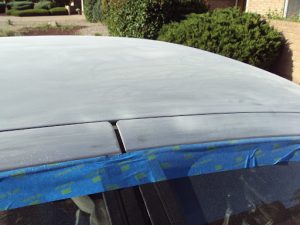
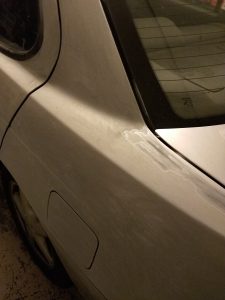
Without much time or money on hand, I’ve decided to repaint my 2002 Nissan. It had a Molten Silver color for its exterior according to the spec doc, but the outer paint started to peel off about 10 years ago. The paint looked fine when I moved to New Mexico nearly 7 years ago though, but, now, the peeling paint has made the car look rather shabby to others. I’m not emotionally attached to the appearance of the car I drive, so it didn’t bother me that much.  In fact, I somewhat enjoy wearing and using things that has a look of being well-worn. I think my own pastor and I share a form of camaraderie for having the shabbiest looking cars at the church.  Anyway, my bumper decided to give recently, and when I bought a replacement it came in its raw, black color, and it needed to be painted. I felt that I might as well repaint the whole car while at it.

I heard from a coworker once that an excellent paint job may cost over a 1,000 bucks, and an average paint job typically costs around 300 to 500. I can’t afford that kind of money at the moment, and there are other expenses that are just waiting to move out of my checking account, so I googled the Internet to find a more frugal way and most of the recent answers seem to be around the use of Rust-Oleum enamel paint.  There are actually many guides and write-ups and I’m indebted to them all, especially Styluss, Craig Fitzgerald, and jtech87. I guess this may seem like yet-another-attempt at a write-up, but this is more as a logging purpose for me to keep track of my progress.  I can only allot 1 or less hour a day to this project, and usually it’s in evening.  I may be able to find little more time on the weekends.

Materials (matches Styluss’ preparation, but mine ended up being about 90 dollars total):

  • Rustoleum high gloss white paint – 1 gallon
  • Odorless mineral spirits – 1 gallon
  • Primer spray paint
  • 4″ High density foam brushes – x9
  • 2″ High density foam brushes – x8
  • Paint trays – x3
  • Sandpaper – 2 packs (400 & 800 grit)
  • Painter’s tape – 1 roll
  • Rustoleum clear coat
  • (optional) Car polish
  • (optional, but recommended) Paint mask, ear plugs or earphones, and goggle

The first draft of my plan (similar to jtech87’s) looks like this:

Subroutine M: Wet a rag with paint thinner (100% mineral spirit) and rub down.
Subroutine T:  Use tack cloth to wipe the surface.
Subroutine P: Paint surface.
Subroutine S(n): [Wet]sand with n grit paper.
Subroutine W(n): Wait at least n hours.

  1. Wear a paint mask, ear plugs (or earphones if you prefer), and a goggle if you don’t want paint particles entering your system in any significant amounts.
  2. Clean the car and do S(400), M, and T. Dust off
  3. Spray primer. W(6).
  4. Prepare paint solution (50% Rust-Oleum Glossy White / 50% thinner) and mix it well.
  5. Do P, and W(6).
  6. Do S(400) to get rid of at least 50% of the orange peel.
  7. Do M, T, P, and W(6).
  8. Repeat steps 6 and 7, and then jump to 9.
  9. Do S(800). Get at least 80% of the orange peel, but do not sand too deep.
  10. Prepare a slightly thicker paint solution (less thinner than last time). Use a new brush.
  11. Do M, T, P.
  12. Apply clear coat.
  13. Apply 2nd clear coat (assuming you’re rotating around the car, you can start at the beginning point on step 12).
  14. Do S(800 or higher).
  15. (optional) Apply polish.

I estimate about a week, but with only an hour a day, it may turn out to be longer. Anyway, here I go.

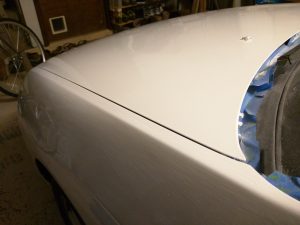
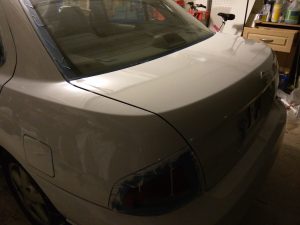
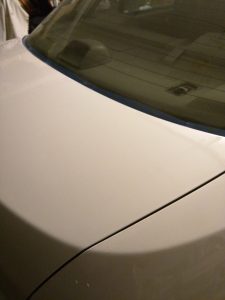
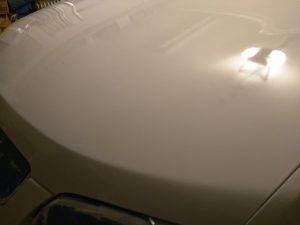
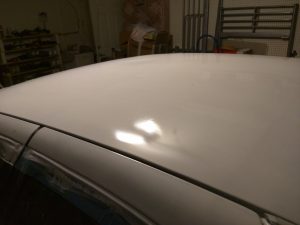
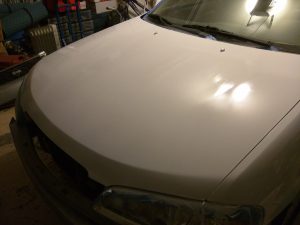
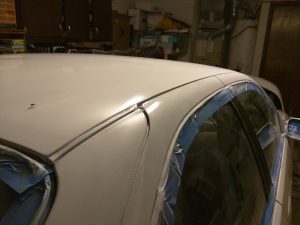
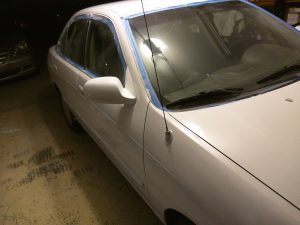
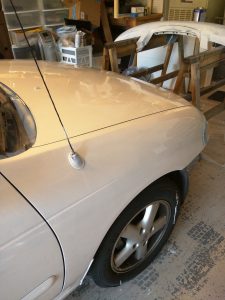
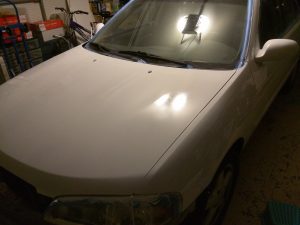
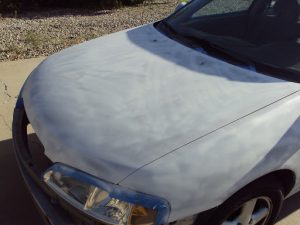
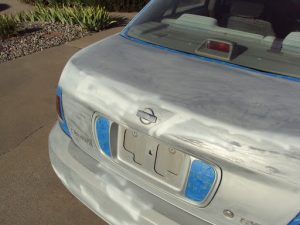
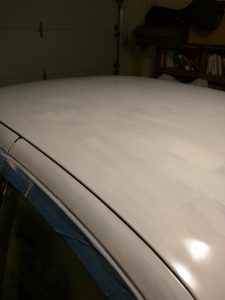
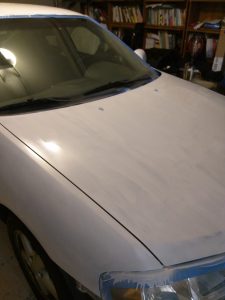
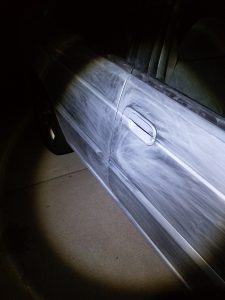
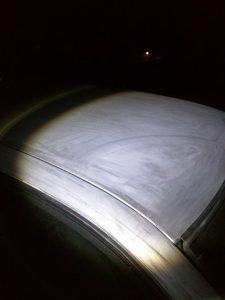
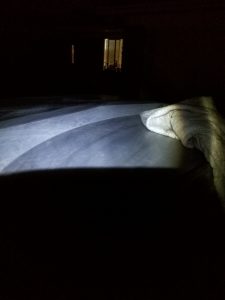
With some preparation time, I ended up with only about 30 minutes of time. In a scale of 1 to 10, where 10 is a thorough job of sanding, I’d probably give myself 5 on this one.  I managed to cover most of the car except for 3 doors.  I imagine I may be sanding for a whole week before I put anything on.

car-cutout-day-1IMG_20160825_234205 IMG_20160825_234215 IMG_20160825_234228

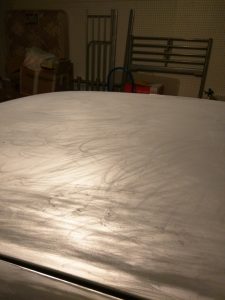
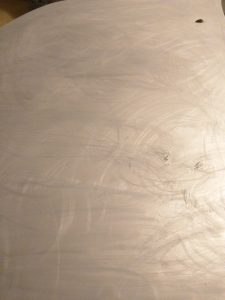
As you can see in the photo, there’s still much more sanding to do.  (Yawn) I need to sleep.

Copying MySQL databases on the same server

Last tested on Ubuntu 16.04.01 LTS (xenial) with MySQL Ver 14.14 Distrib 5.7.13

We had to make a copy of existing databases for development app instances.  For example, a database called xp_main was for the production and xpdev_main would be for development. This depends on how date strings were created, but if you have a lot of dates in the records you may want to turn off the NO_ZERO_DATE mode.  If you don’t turn it off, the copying process can be interrupted. Go into your MySQL console.

mysql> select @@sql_mode;
+-------------------------------------------------------------------------------------------------------------------------------------------+
| @@sql_mode |
+-------------------------------------------------------------------------------------------------------------------------------------------+
| ONLY_FULL_GROUP_BY,STRICT_TRANS_TABLES,NO_ZERO_IN_DATE,NO_ZERO_DATE,ERROR_FOR_DIVISION_BY_ZERO,NO_AUTO_CREATE_USER,NO_ENGINE_SUBSTITUTION |
+-------------------------------------------------------------------------------------------------------------------------------------------+

As you can see NO_ZERO_DATE exists.  Copy paste the entire string w/o NO_ZERO_DATE.

mysql> set global sql_mode='ONLY_FULL_GROUP_BY,STRICT_TRANS_TABLES,NO_ZERO_IN_DATE,ERROR_FOR_DIVISION_BY_ZERO,NO_AUTO_CREATE_USER,NO_ENGINE_SUBSTITUTION';
Query OK, 0 rows affected, 1 warning (0.00 sec)
mysql> exit
Bye

Next, we will copy the database using mysqldbcopy utility.  You may need to install mysql-utilities package if you don’t have it available.

$ mysqldbcopy --drop-first --source=root:mypassword@localhost --destination=root:mypassword@localhost xp_main:xpdev_main
WARNING: Using a password on the command line interface can be insecure.
# Source on localhost: ... connected.
# Destination on localhost: ... connected.
# Copying database eh_bcbs renamed as ehdev_bcbs
# Copying TABLE xp_main.accesses
# Copying TABLE xp_main.accessflags
# Copying TABLE xp_main.activities
# Copying TABLE xp_main.activitytype_items
# Copying TABLE xp_main.encounter_goals
# Copying TABLE xp_main.files
# Copying TABLE xp_main.tester1_intake_subseqvisit_goals
# Copying TABLE xp_main.tester1_game_careplan_goals
# Copying TABLE xp_main.localgames
# Copying TABLE xp_main.roles
# Copying GRANTS from xp_main
# Copying data for TABLE xp_main.accesses
# Copying data for TABLE xp_main.accessflags
# Copying data for TABLE xp_main.activities
# Copying data for TABLE xp_main.activitytype_items
# Copying data for TABLE xp_main.encounter_goals
# Copying data for TABLE xp_main.files
# Copying data for TABLE xp_main.tester1_intake_subseqvisit_goals
# Copying data for TABLE xp_main.tester1_game_careplan_goals
# Copying data for TABLE xp_main.localgames
# Copying data for TABLE xp_main.roles
#...done.

That should do it!

Copying or moving all of MySQL databases

This is just one of the ways you can move all of the MySQL databases from one server to another.  This was tested on Ubuntu 16.04.01 LTS (xenial) distro.

Log in as an admin on MySQL Console and lock the database to allow only read operations.

mysql> flush tables with read lock;
mysql> set global read_only = on;
mysql> exit

Dump all of the databases into a file.

$ mysqldump --lock-all-tables -u root -p --all-databases > dbs.sql

Copy the dump to the new server. RSYNC is preferred over SCP, especially if the file is large.

$ rsync -tvz --progress dbs.sql mhan@newserver.com:~/files/
or
$ scp dbs.sql mhan@newserver.com:~/files/

The DB can be (optionally) unlocked. This may or may not be a good thing to do in your case. Do it at your own risk.

mysql> set global read_only = off;
mysql> unlock tables;
mysql> exit

On the new server, execute this command to import the new SQL dump.

$ mysql -u root -p < ~/files/dbs.sql

IMPORTANT: If your file is large, or you just have a lot of records, you may want to make sure you have something bigger than 16M for max_allowed_packet attribute in your my.cnf (usually found under /etc/mysql/ or /etc/mysql/mysql.conf.d/) on your new server where you’re doing the import, else the server could hang on a large insert operation and your MySQL server may actually decide to go away, literally.  On one of the servers I had it for 1024M just for this operation and brought it back low afterwards.

Recommended file permissions for WordPress

Private WordPress installations seem to be the drum that hackers like to hit on these days.  It seems that many themes are also vulnerable as well. I’m not saying this is the answer to mitigate hacking attempts, but merely as a starting point.  Anyway, as a starting point for fortifying a WP installation here are recommended file permissions settings for a WordPress installation on a Linux box.  These commands will set 750 for all folders, 640 for files, and 600 for wp-config.php file. Sitting with a root/sudo access on a parent folder from a WP installation folder (assuming wpfolder here).


# find wpfolder -type d -exec chmod 750 {} +
# find wpfolder -type f -exec chmod 640 {} +
# chmod 600 wpfolder/wp-config.php


You may also want to make sure that only wp-content folder is owned by www-data (or whatever your webserver may be using).

Adding sudoers

A file can be added for groups of users or specific users to /etc/sudoers.d/ directory. This line would make someone a sudoer with no password requirement.

jsmith ALL=(ALL) NOPASSWD:ALL

If you want the user to type a password.

jsmith ALL=(ALL:ALL) ALL

Updating sudoers file safely

  • Last checked on Ubuntu 16.04.01 LTS (xenial)

The command visudo checks the validity of the sudoers file before making the actual update to the file, and this is the recommended way of editing the file because one can potentially lose sudo privileges unintentionally.

$ sudo visudo

Instead editing /etc/sudoers file I usually create a file at /etc/sudoers.d/localusers so I edit that instead.

$ sudo visudo -f /etc/sudoers.d/localusers

Changing the default editor used for visudo

I’m a VIM user, but many of the distros default to nano for newcomers to Linux systems. You can use the following command to change the default editor that is loaded for visudo and for many other apps.

$ sudo update-alternatives --config editor